Tender, Juicy Smoked Beef Short Ribs: A Crowd-Pleasing Dish
You know that warm, honest meal that brings people together. Maybe it was at a family picnic or a weekend cookout when the smell of oak and a slow cooker pulled everyone to the table. That feeling is what this post aims to recreate for you.
In this recipe, you’ll get a clear, step-by-step method that focuses on temperature, time, and a tactile doneness test so you can repeat great results. You’ll learn how to trim, season with a simple SPG or a beef rub, set your smoker, and watch the meat transform.
You’ll leave with the confidence to manage heat, select the right wood for balanced flavor, and rest the ribs so they slice tender. Expect practical tips on texture, nutrition like iron and vitamin content, and options if you want a braise finish for ultra-tender results.
Why You’ll Love This How-To Guide for Smoked Beef Short Ribs
This guide gives you a clear path to reliably great results, from setup to slice. You get a no-nonsense recipe that focuses on what matters: flavor, tenderness, and repeatability.
Low-and-slow works best. Maintain a steady 225–250°F in your smoker and use light hardwoods like cherry or oak for balanced smoke without masking the meat.
- Expect a 5–8 hour cook window. Plan prep and rest so dinner arrives right on time.
- Cook to temperature, not the clock — aim for an internal target near 205–210°F and a buttery probe feel.
- Simple seasoning lets natural flavor shine; optional braise adds richness if you want it.
You’ll also learn practical cues: when to spritz, when to wrap, and when to rest. Follow this flow and your smoker decisions become confident and repeatable.
Know Your Cut: Beef Short Ribs Basics and Smart Buying Tips
Choosing the right cut at the counter sets you up for consistent tenderness and clear cook times.
Plate vs. back: plate short ribs have the most meat sitting on top of the bones and are the common choice for low-and-slow cooks. Back ribs come from nearer the spine and have more meat between bones, which changes cook time and texture.
Marbling matters. Look for Choice, Prime, or Wagyu grading — more marbling equals better flavor and a more forgiving cook. Use marbling, not price alone, to judge quality for this recipe.
Cut style and build: English-cut, bone-in short ribs give thick, even meat that forms a good bark and renders evenly. Choose similar-sized pieces so they finish together.
- Trim visible fat and remove the top silver skin so smoke and seasoning hit the meat directly.
- Leave the membrane on the bone side if you want extra structure while the meat cooks.
- Compare single 3-inch ribs to 3-bone, 6-inch racks to match your smoker space and schedule.
Pro tip: Treat plate short cuts like a compact brisket for richness, and avoid overly thin or uneven pieces that dry out. A light touch with salt and a beef-forward rub works best — this keeps the profile clean compared with pork approaches.
Gear, Wood, and Fuel: Set Up Your Smoker for Success
A steady setup makes the difference between a frustrating cook and repeatable results. Start by preheating your unit to a consistent 225–250°F. That gentle range lets fat render slowly and bark form without drying the meat.
Smoker basics and airflow
Arrange racks so air circulates around each piece. Track temperature at grate level and make only small vent tweaks to avoid overshoots. Use probes to monitor surface and internal temps without lifting the lid.
Wood and fuel strategy
Choose clean-burning fruit and hardwoods like oak, cherry, apple, or pecan. These give balanced smoke that enhances rather than overpowers the natural flavor.
“Thin blue smoke is your sign of a healthy burn; avoid heavy, billowing clouds.”
| Element | Why it matters | Quick tip |
|---|---|---|
| Temperature | Controls fat rendering and bark | Stabilize at 225–250°F |
| Fuel | Maintains steady heat for long cooks | Top off pellet hoppers or stage charcoal |
| Water pan | Moderates swings and preserves moisture | Use with charcoal or gas smokers |
| Wood choice | Defines smoke profile | Pick oak/cherry/apple/pecan; avoid heavy hickory |
- Prep checklist: preheat, fuel topped, probes ready.
- Plan about 5–7 hours at 250°F (longer for large plate racks).
- Place pieces with space between so smoke and heat flow evenly.
Tip: Minimize lid openings. Let steady smoking and controlled airflow build flavor and texture.
Prep and Seasoning: Trim, Dry Brine, and Build Flavor
Good prep makes the difference between a flat finish and a layered, savory crust. Start by trimming the top silver skin and any heavy waxy fat so your seasoning and smoke can reach the meat.

Trim, binder, and basic seasoning
Remove the fat cap areas that won’t render but leave the bone-side membrane intact for structure. Use a binder to help the rub stick: spicy brown mustard for a tangy edge or olive oil for a neutral carry.
SPG vs. beef rub and dry brine
Simple SPG — kosher salt, coarse pepper, granulated garlic — highlights the meat without clashing. If you choose a beef rub, keep sugar minimal to avoid premature darkening during high-heat portions.
Consider a light overnight dry brine. Salt ahead by a few hours to deepen seasoning and aid moisture retention.
| Step | Why it matters | Quick tip |
|---|---|---|
| Trim silver skin & excess fat | Improves smoke and seasoning contact | Trim only nonrendering fat; leave flavorful fat behind |
| Choose a binder | Helps rub adhere without altering cook time | Mustard for tang, olive oil for neutrality |
| Season evenly | Builds consistent bark and flavor | Season edges and ends for balanced crust |
| Overnight dry brine | Deeper seasoning, better moisture | Salt lightly; refrigerate uncovered 6–12 hours |
Smoked Beef Short Ribs: Step-by-Step Process
Start the cook by stabilizing heat — that small step shapes everything that follows.
Preheat and placement
Preheat your smoker to 225–250°F. Stage probes, tools, and trays so you can load quickly and lock in steady heat.
Place each piece bone-side down with space between so airflow stays clean and bark forms evenly.
Unwrapped smoke to set color
Run an unwrapped smoke for about three hours without opening the lid. That undisturbed window sets color and helps a tight crust adhere.
When to spritz and when to stay closed
Begin light spritzing after the initial set. Use beef stock for a savory mist or a mix of apple cider vinegar and water for a bright touch.
Keep spritzes short and open the lid only long enough to mist so chamber time stays steady. Expect roughly 5–7 hours at 250°F; smaller pieces can finish in about six hours at 225°F.
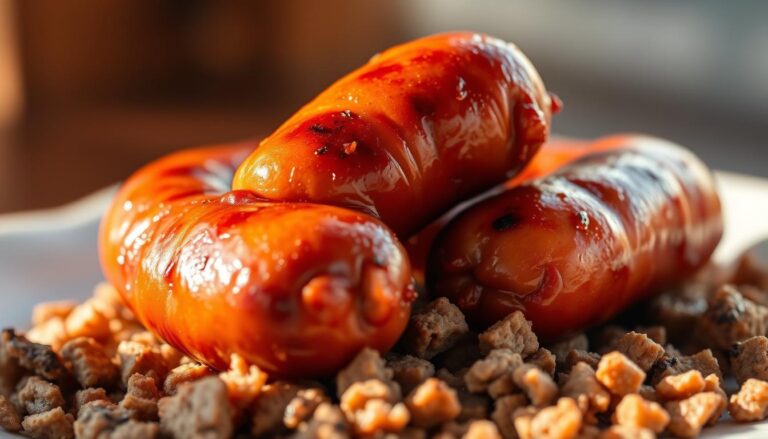
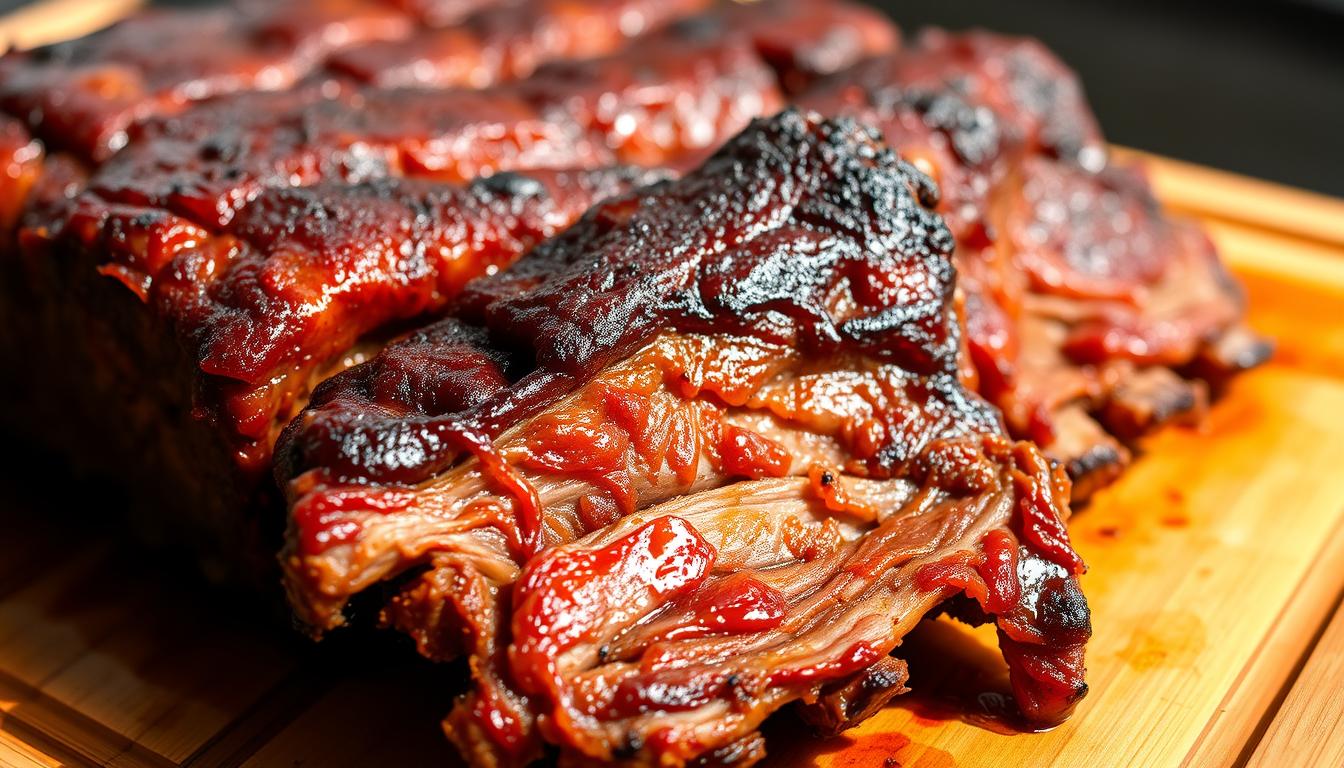
- Watch for a rich mahogany sheen — that means the bark is settling.
- Keep smoke thin and blue by managing fuel and vents.
- Rotate racks only if you see hot spots; otherwise move pieces as little as possible.
Internal Temperature and Doneness Cues You Can Trust
Trust clear temperature cues and a simple probe test to know when your rack is perfectly tender.
Target the 200–210°F range for finishing, with many cooks aiming near 205–210°F where collagen breaks down and fat renders to juicy texture.

Use a reliable instant-read thermometer as your primary guide, but pair numbers with feel. The true test is tactile: the probe should glide in like it’s entering room-temperature butter, with almost no resistance.
- Check internal temperature in several spots, especially between bones and at the thickest center.
- Keep your thermometer clean and calibrated—small errors matter at this stage.
- Respect carryover heat; the internal temperature can rise a few degrees after pull.
Cook to both number and feel, not the clock. Different pieces on the same rack finish at different times, so pull each rib when it reaches that buttery probe feel. Log your final temperatures and sensations so your next cook repeats the same success.
Spritzing and the Optional Braise Finish for Ultra Tender Ribs
A light mist at the right moment and a short, covered braise can change texture fast. Begin spritzing after the first 1–3 hours, once the bark starts to set and the color moves toward mahogany.
Apple cider vinegar spritz: timing and technique
Use apple cider vinegar mixed 1:1 with water or apple juice. Start around the 3-hour mark, then spritz quickly and sparingly to avoid long lid-open minutes.
Tip: Keep each spritz to a few seconds and wait until the surface looks dry again before repeating. This brightens flavor without washing away your rub.
Wine and broth bath: when to wrap and why it works
When color is deep mahogany (roughly the 3-hour spot), transfer pieces to a snug pan. Add a shallow bath of red wine and beef broth—about enough to come halfway up the meat side.
Include butter, Worcestershire, and a pinch of rub if you want more richness. Cover tightly with foil and return to 225–250°F until the internal read reaches about 200–205°F+ and the probe glides in like butter.
Choosing the right pan and bone-side orientation in the braise
Select a pan that holds ribs close together so liquid concentrates. Set the bone side up so the meat face soaks in the braise while bones stay slightly elevated.
| Step | Why it helps | Quick action |
|---|---|---|
| Spritz with apple cider vinegar mix | Brightens surface flavor and controls dryness | 1–3 hour start; short, frequent sprays |
| Move to pan at mahogany color | Speeds collagen breakdown and adds depth | Use red wine + beef broth; cover tightly |
| Bone side orientation | Meat bathes while bones stay clear | Place bone side up in snug pan |
- Plan 5–7 total hours at 225–250°F depending on size.
- Monitor internal temps and feel—braise assists tenderness but does not replace the probe test.
- Reduce the braising liquid for a pan sauce after pouring off if desired.
Rest, Slice, and Serve: Lock In Juices and Maximize Flavor
Give your rack a short, intentional pause so flavor and texture finish their work. Resting is not wasted time — it equalizes juices and protects the crust. The window you choose depends on finish method and serving plans.
Resting windows and why they matter
If you finish dry, rest the pieces loosely tented for 20–30 minutes. This lets juices redistribute without steaming the bark. For a braise finish, a shorter 5–10 minutes is enough because the meat is already hot and saturated.
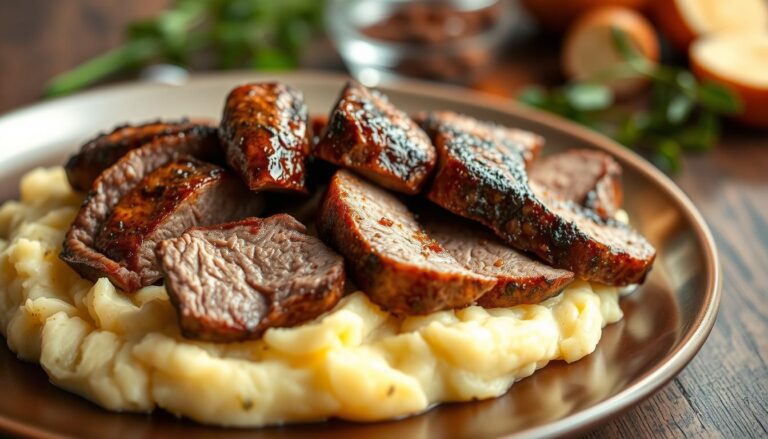
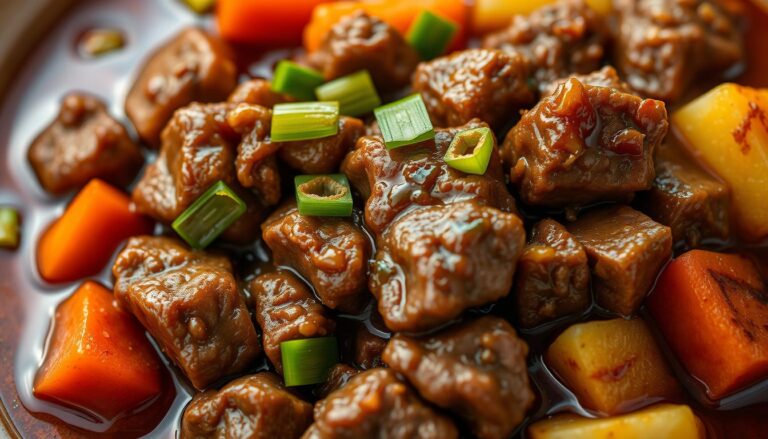
Slice, plate, and serving ideas
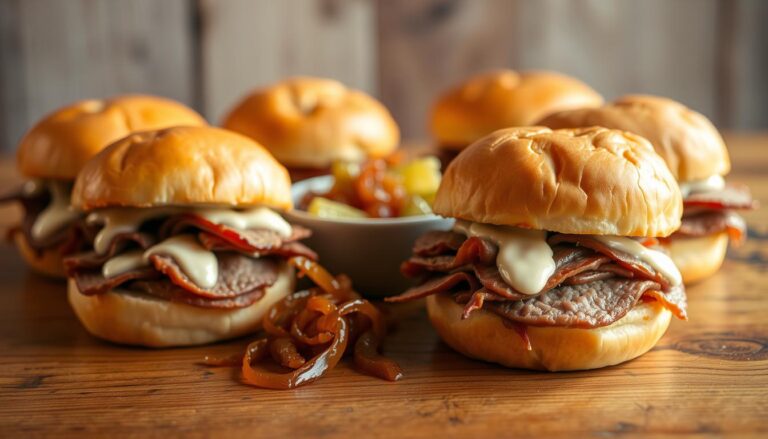
Slice between bones using long, smooth strokes so each rib shows the smoke ring and juicy interior. Serve with complementary sides like mashed potatoes, baked beans, mac and cheese, or simple green beans to balance richness.
- Keep sauces optional — a light glaze or reduced braise jus will enhance but not mask the main flavor.
- Finish at the table with a pinch of flaky salt or a grind of black pepper.
- Hold extra ribs warm in a low oven for a crowd, or save leftovers for tacos or sandwiches the next day.
Troubleshooting Texture, Time, and Temperature
Tough results usually trace back to a few predictable issues: temperature, time, or moisture. Start by checking the internal temperature and the feel of the meat with a probe and a quick thermometer test.
If ribs are tough: undercooked vs. dried out and how to fix
If the internal temperature is below ~200°F and the probe tugs, the meat is likely undercooked. Cover and continue cooking until the probe slides in like butter and the read reaches about 200–205°F+.
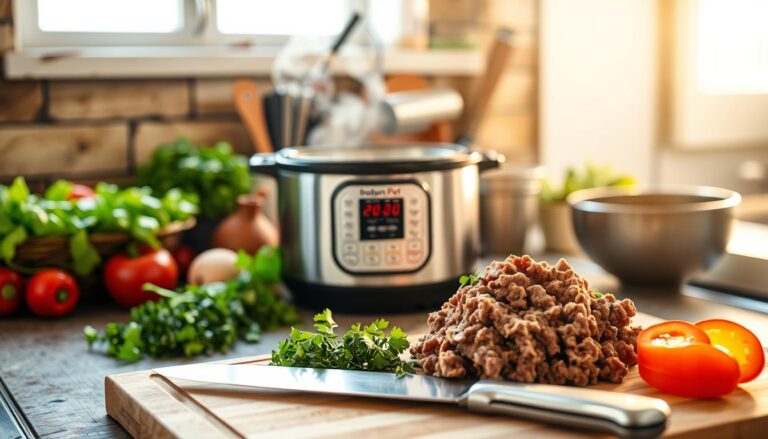
If pieces are dry or overcooked, rescue them with moisture. Place ribs in a snug pan with a splash of warm beef broth, cover tightly, and gently reheat to rehydrate without driving the temp much higher.
Time planning at present: 5-8 hours cook window plus rest
Plan about 5–7 hours at 225–250°F for smaller cuts, and allow extra hours for larger racks. Add rest time so service stays calm and juices settle.
- Use your thermometer and probe as primary guides; test several spots.
- Avoid constant lid peeking — each open stretch can add minutes and slow your timeline.
- Log temps, hours, wood, and weather so your next cook is easier and more consistent.
Conclusion
,
A steady heat plan, basic seasoning, and a reliable probe test are all you need to cook with confidence.
Use this recipe as your repeatable map: trim silver skin, choose oak or cherry, run three hours unwrapped, then spritz with apple cider vinegar and decide if a wine-and-broth braise fits your finish.
Finish to 200–210°F and pull when the probe glides like butter. Rest briefly, slice between the bones, and serve with simple sides and a final crack of pepper and salt.
Bookmark this post, try other recipes, and note timings so your next cook improves. The plate is rich in iron and vitamins, and the method scales to other cuts when you follow the same fundamentals.