Learn How Long to Cook Turkey Necks on the Stove
You know that feeling when a simple pot can hold a whole afternoon of comfort? This guide speaks to that quiet hope: a straightforward plan for a cozy, reliable meal you can share with family.
You’ll get clear timing for raw and pre-smoked options, plus easy tips for a pot-au-feu style simmer, a sear-and-smother method, and safe doneness cues like 165°F. Use a large stock pot or Dutch oven and keep a gentle simmer under a lid for steady results.
Follow simple seasoning notes when working with smoked pieces, learn when to add vegetables, and how to keep meat submerged to avoid drying. By the end, you’ll feel ready to plan dinners that stretch across days, rescue a too-salty broth, and serve up rich, comforting dishes with confidence.
Table of Contents
What you’ll learn today about cooking turkey necks on the stove
You’ll get clear timing windows and simple, practical instructions for both raw and pre-smoked pieces. Raw necks usually simmer about 45 minutes, then another 30 minutes after you add vegetables in a covered stock pot or Dutch oven.
Pre-smoked pieces need gentler heat and about 1.5–2 hours of low simmer. Cover partially, check liquid, and hold off on extra salt until the end because smoked meat can be salty.
Doneness combines texture and temperature: aim for a fork-tender pull from bone and an internal reading of 165°F. A quick sear before a low-and-slow simmer boosts flavor without adding time.
- You’ll learn which pot gives steady heat and why a heavy-bottomed Dutch oven helps.
- Simple aromatics and stock build a savory base without stretching total time.
- Storage and reheating notes will help you serve turkey again the next day without drying.
| Start Type | Typical Simmer | Key Tip |
|---|---|---|
| Raw | 45 min + 30 min with vegetables | Cover tightly; add veg late |
| Pre-smoked | 1.5–2 hours | Cover partially; season at end |
| Both | Check for fork-tender & 165°F | Sear first for more flavor |
Understanding timing: how stove-cooked turkey necks get tender
A steady, quiet simmer is the secret that turns tight neck pieces into tender, flavorful bites. Focus on temperature, not fire; a low, even heat gives collagen time to dissolve and keeps broth clear.
Raw turkey necks on the stovetop: plan about 45 minutes of simmer, then add vegetables and continue another 30 minutes for a pot-au-feu finish. Keep the pot covered and set heat at medium-low so the liquid barely bubbles.
Pre-smoked turkey necks on the stovetop: expect roughly 1.5–2 hours. The goal is to rehydrate and gently render connective tissue without over-salting. Leave a small lid gap to prevent boil-overs and keep pieces submerged.
“A gentle simmer lets collagen convert to gelatin gradually, so the meat pulls easily from the bone.”
- Turn down heat if you see aggressive bubbling; a rolling boil tightens meat fibers.
- Cut pieces cook faster because more surface meets the broth; large pieces may add minutes.
- Probe midway: fork-tender and clean bone release beat any clock as your finish cue.
how long to cook turkey necks on the stove
Get fast, practical timing so you can plan a pot full of savory results for raw pieces, smoked pieces, or a braised-onion finish.
Quick reference by type:
- Raw: simmer about 45 minutes, then add vegetables and continue ~30 minutes until tender.
- Pre-smoked: maintain a gentle simmer for 1.5–2 hours; keep pieces submerged and leave the lid slightly ajar.
- Braised-onion method: sear, simmer 30 minutes, add onions, then cook ~20 more minutes until fork-tender and juicy.
Internal doneness and texture cues:
- Use a fork: meat should pull from bone with little resistance.
- Check the internal temp at the thickest spot for at least 165°F.
- If pieces are large, add extra minutes; smaller cuts will finish sooner.
“Let texture and temperature guide your finish—those cues beat the clock every time.”
| Method | Typical Simmer | Key Cue |
|---|---|---|
| Raw | 45 min → +30 min with veg | Fork-tender; 165°F |
| Pre-smoked | 1.5–2 hours | Keep submerged; season at end |
| Braised-onion | Sear → 30 min, +20 min with onions | Juicy pull; check temp |
Essential equipment and setup for steady, even simmering
Choose the right vessel first. Pick cookware that spreads and holds warmth so you can keep a calm simmer without hotspots. A heavy-bottomed pot moderates bursts of high heat and reduces scorching.
Stock pot vs. Dutch oven: which to choose and why
A tall stock pot gives vertical room so pieces sit fully submerged in liquid. That helps large batches finish evenly.
A heavy dutch oven excels for low-and-slow work. Thick walls and a snug lid stabilize temperature and make a clear stock easier to maintain.
Lid control, heat settings, and preventing boil-overs
Use a well-fitting lid to trap steam; for smoked pieces leave a small gap if foam or boil-over starts. Set your burner to medium-low once you reach a gentle simmer.
Keep hot water nearby to top off the pot without stopping the simmer. If scum appears, skim it away gently so the broth stays clean.
- Match pot size to batch so necks sit in one layer with an inch of liquid above.
- Use long tongs or a slotted spoon for checks to avoid splashes.
- Consider a heat diffuser if your stove runs hot; it evens the flame under a dutch oven or pot.
| Vessel | Best For | Advantage |
|---|---|---|
| Stock pot | Large batches | More vertical space for submerged pieces |
| Dutch oven | Low-and-slow | Stable temps and even heat |
| Diffuser (optional) | Hot stoves | Reduces hotspots |
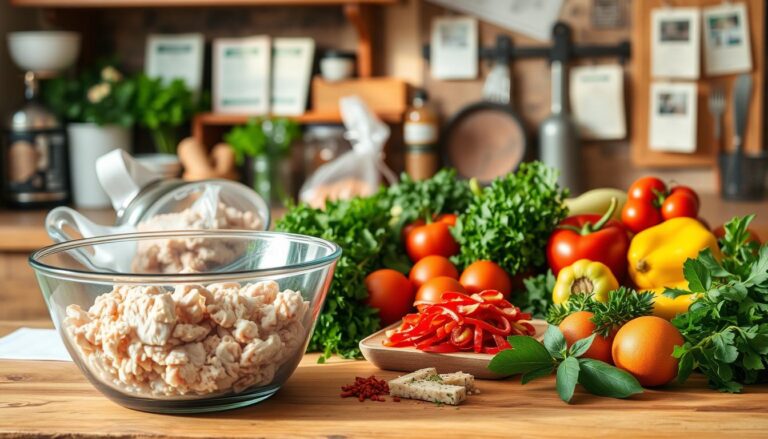
Core ingredients that boost flavor without extending cook time
Start with a simple liquid base so flavor builds quickly without adding steps.
Choose low-sodium chicken broth or plain water as your foundation. Low-sodium broth gives control over salt, which is crucial when working with smoked pieces.
Build fast flavor with classic aromatics: onion, garlic, fresh thyme, and a bay leaf. These aromatics infuse the broth rapidly and do not lengthen the simmer.
Pot-au-feu style and finishing touches
Add carrots, celery, potatoes, cabbage, and a whole onion for body and natural sweetness. These ingredients complement turkey necks and enrich the stock while the meat releases gelatin and protein.
- Season lightly at first; taste the broth near the end.
- Finish with ground black pepper and a small pinch of salt after tasting.
- For mild smoke with raw pieces, a pinch of smoked paprika adds depth without time cost.
Avoid high-salt bouillon when simmering smoked meat. If you need more savory punch, use a splash of stock rather than extra salt. Add delicate herbs in the last 20–30 minutes so they stay bright.
Step-by-step: stovetop method for raw turkey necks
Start simple and steady. Section each turkey neck into three pieces and pat them dry. Heat a little oil in a large dutch oven or stock pot and brown the pieces in batches until edges caramelize.
Add the browned pieces back to the pot with thyme and a bay leaf. Cover with water or low-sodium stock, bring just to a boil, add a pinch of salt, then lower to a gentle simmer.
- Skim any surface scum and keep the heat steady so the simmer is calm. Cover and simmer ~45 minutes.
- After 45 minutes, add cabbage wedges, carrots, celery, a whole peeled onion, potatoes, and a turnip so they finish with the meat.
- Bring the liquid briefly back to a boil, then reduce and simmer another ~30 minutes until vegetables are tender and the meat pulls from bone.
Taste the broth and season lightly with salt and black pepper. Skim excess fat if you prefer a clearer stock, or leave a thin layer for body.
Serve broth in warmed bowls with toasted baguette and Gruyère, then plate the meat and vegetables as a main. Reserve extra liquid from the turkey necks pot for gravy or soups.
“Brown first, simmer gently, then finish with vegetables for a classic pot-au-feu style finish.”
Step-by-step: stovetop method for pre-smoked turkey necks
Ready the pan and keep it calm. Quick rinse and pat dry the smoked pieces so surface salt does not over-season the broth.
Add turkey necks to a large heavy-bottomed pot or Dutch oven with a quartered onion and lightly crushed garlic cloves. Cover with water or low-sodium chicken broth and bring just to a boil.
Reduce heat immediately to a gentle simmer and let the turkey necks simmer for about 1.5–2 hours. Keep the lid slightly ajar to vent steam and avoid boil-overs.
- Check every 20–30 minutes. Top off with hot liquid so the pieces stay submerged and stir gently to prevent sticking.
- Season only after the simmer; taste the broth first because smoked meat often carries salt. Finish with a pinch of salt and ground black pepper as needed.
- Add hardy herbs like thyme near the final 20 minutes for brightness. For a mild kick, include sliced jalapeño or a pinch of cayenne in the last half hour.
“When the meat pulls from bone with little resistance, turn off the heat and let juices settle before serving.”
| Step | Action | Why it matters |
|---|---|---|
| Prep | Rinse, pat dry, add onion & garlic | Removes excess salt; builds quick aromatics |
| Simmer | Boil, then low simmer 90–120 minutes | Rehydrates smoked meat and renders connective tissue |
| Finish | Season, add herbs, rest | Controls salt and preserves smoky flavor |
How to tell when turkey necks are done
Trust simple, direct cues rather than a timer alone. Texture, bone release, and an instant-read temperature give the clearest answer so you serve safely and with great flavor.
Quick checklist:
- Slide a fork between the meat and bone; if it pulls away without resistance and strands separate easily, your turkey necks are done.
- Wiggle a vertebra segment—clean bone release shows connective tissue has melted into the broth.
- Confirm with an instant-read thermometer in the thickest section: at least 165°F for safe serving.
If the meat clings, simmer another 10–15 minutes at low heat and test again. For shreddable texture, extend the simmer until bones nearly fall free, then cool briefly before handling.
For braise-style cooks, check onions and gravy: softened onions and a slightly thickened sauce usually match perfect neck tenderness. For smoked batches, taste the broth—aim for a balanced, savory liquid, not aggressively salty.
“Use texture and temperature together: they beat the clock every time.”

| Indicator | What it means | Action |
|---|---|---|
| Fork-tender pull | Meat separates easily from bone | Plate and serve or rest briefly |
| Clean bone release | Collagen fully converted to gelatin | Finish simmer and cool slightly |
| 165°F read | Safe internal temp | Remove from heat |
Time factors that change your simmer window
Slice size and pot choice shift your simmer window more than a clock ever will. Small changes in prep or equipment alter the minutes you need for a tender result.
Neck size, bone-to-meat ratio, and cut pieces
Larger turkey pieces with thick sections take longer because heat must reach the center. Cutting each neck into two or three pieces increases surface area and often shaves minutes off total time.
A higher bone-to-meat ratio can reach fork-tender faster, yet dense sections still may need extra simmer for full bone release.
Liquid level, pot type, altitude, and stove variance
- Keep liquid high: submerge pieces to avoid drying and slowdowns.
- Heavy-walled pot: evens temperature and prevents spikes that toughen surfaces.
- Altitude: boiling point drops at height, so add time if you’re above sea level.
- Stove output: if your burner runs hot, lower heat and allow a few extra minutes.
- Don’t lift the lid often; combine checks to hold heat steady.
“Adjust pieces, maintain submersion, and let steady heat do the work.”
Heat management: keeping necks submerged and tender
Small, steady adjustments matter most. Start at medium-high only until the liquid reaches a brief boil, then cut the flame so a calm simmer holds. That gentle heat lets collagen soften without tightening the meat.
Keep your pot lid slightly ajar to stop messy boil-overs while limiting evaporation. Check liquid every 20–30 minutes and top off with hot water or stock so pieces stay fully submerged and heat penetrates evenly.
Skim foam early for a cleaner broth and avoid vigorous skimming that stirs up the liquid. Use the smallest burner that fits your pot base to reduce hotspots and keep an even temperature across the bottom.
- Gently rotate and lift pieces to prevent sticking, but avoid breaking delicate meat near the end.
- Tuck aromatics under and around the meat so floating items do not slow heat transfer.
- If you must pause, lower heat to very low with the lid on; resume by bringing back to a quiet simmer before counting final time.
“Finish with a short rest off heat so juices settle and fibers relax.”
Flavor upgrades that don’t derail timing
Small seasoning choices will deepen taste without adding minutes. Add a sprig of thyme and a bay leaf near the start so their oils perfume the broth as the meat softens.
Build savory depth with a quartered onion and whole garlic cloves early on. For raw pieces, a light pinch of smoked paprika adds smoke-like warmth without extra simmering.
Fold in cabbage wedges, carrots, potatoes, and celery after the initial simmer so vegetables finish tender but intact. If you like a Southern side, keep brown sugar for baked beans rather than the pot; it complements smokiness without changing recipes in progress.
- Use salt sparingly, especially with pre-seasoned meat; finish seasoning at the end.
- Skim excess fat near the finish for a lighter broth or leave some for mouthfeel.
- Add delicate herbs in the last 20 minutes so flavors stay bright.
“Let simple herbs and timed vegetables highlight the natural character of tender necks and a clear, savory broth.”
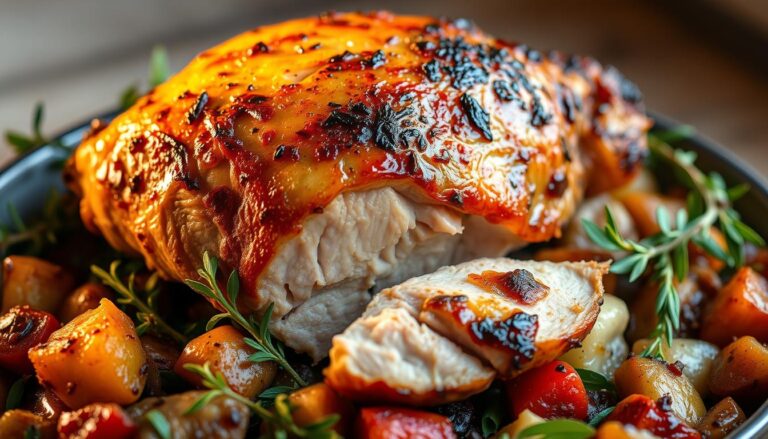
Serving ideas: turning simmered necks into a complete meal
Start simply and let the broth lead the meal. Ladle hot broth into warmed bowls, top each with a toasted baguette slice and a little melted Gruyère for an elegant first course.
Then plate the meat and vegetables. Arrange the neck pieces and braised veg on warm plates so diners can add broth as they like. For family comfort, offer hearty sides: fluffy rice, braised greens, mashed potatoes, or cornbread.
Smoked pieces pair especially well with steamed rice or greens. If you include baked beans, a splash of ketchup and a touch of brown sugar balances smoke and adds a sweet note.
- Watch for small bones; shred meat for kids to make the meal safer and easier to eat.
- Plan two to three parts per person, depending on appetite and other sides.
- Warm bowls and plates ahead so broth and protein stay hot from kitchen to table.
“Offer coarse salt and black pepper at the table so guests can finish their own bowls.”
Leftovers work great in next-day recipes—stews, rice bowls, or simple soups—stretching one pot into several meals.
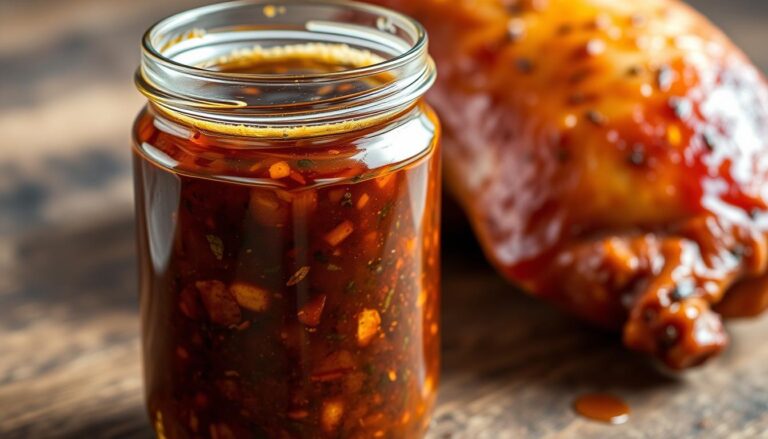
Making and using the broth you just created
Strain, chill, and store the liquid you made so it becomes the backbone of future soups and sauces. Start by skimming surface fat to your preference; leave a thin layer for body or remove most for a lighter broth.
Strain through a fine mesh to catch aromatics and small bone bits, then cool the liquid quickly. If you need to reduce for gravy, return that strained broth to a clean pan and simmer until flavors concentrate.
- When reducing, use low-sodium chicken broth to top off so you avoid over-salting the final sauce.
- Thicken with a light roux or cornstarch slurry and add a small bit of butter at the end for shine—great over potatoes or braised veg.
- Label and chill in a container with headspace; use an airtight container for best freshness in fridge or freezer.
“A cold pot of broth that firms into a gel is a sign you built real body and flavor.”
| Action | Why | Tip |
|---|---|---|
| Skim & strain | Cleaner liquid | Use fine mesh |
| Reduce | Concentrates flavor | Top off with low-sodium stock |
| Store | Easy future use | Freeze in measured blocks |
Leftovers, storage, and reheating for best texture
Treat your pot like planned leftovers. Cool meat and broth quickly, then transfer them to an airtight container. Chill within two hours to keep quality and safety high.
Refrigerate for 3–4 days. For longer storage, freeze portions in labeled containers or freezer bags for up to about three months for best texture and flavor.
Safe reheating
On the stove, add a splash of water or low-sodium broth, cover, and warm over low to medium heat until heated through. Bring soups briefly to a boil, then reduce to a simmer before serving.
In the microwave, use a covered, microwave-safe container and heat in short bursts, stirring between intervals for even warmth. Reheat only the portion you will eat to avoid repeated chilling.
Taste and adjust. Salt can concentrate during storage, especially with smoked pieces. If broth tastes salty, dilute with unsalted stock or water instead of adding more salt.
| Storage | Duration | Reheat tip |
|---|---|---|
| Refrigerator | 3–4 days | Warm covered over low heat |
| Freezer | About 3 months | Thaw overnight in fridge before reheating |
| Serving | Single portions | Reheat only what you will eat |
Troubleshooting common stovetop issues
A calm pot and a few smart moves will rescue a stubborn batch.
Tough meat: lower your heat to a gentle simmer and keep pieces submerged. Continue cooking until a fork pulls the meat easily from bone or an instant-read shows 165°F.
Overly salty broth: this often happens with smoked pieces. Dilute with warm water or low-sodium chicken broth, simmer a few minutes, then taste before adding any more salt.
Too much evaporation: partially cover the pot and top up with hot liquid in small amounts so the simmer stays steady without cooling the pot.
- Skim foam early; avoid a rolling boil that emulsifies fat and clouds flavor.
- If the bottom sticks, drop the burner setting and stir gently; a heavier pot helps hold even heat.
- For dull flavors, add a splash of fresh stock and a squeeze of lemon or a dash of vinegar off heat.
- If broth tastes bitter, replenish with water or stock and simmer briefly to rebalance.
“Gentle heat, full submersion, and time fix most texture issues.”
| Problem | Quick Fix | Why it works |
|---|---|---|
| Tough meat | Lower heat; extend simmer | Collagen needs time to convert |
| Too salty | Dilute with low-sodium stock | Balances concentrated salt |
| Excess evaporation | Partially cover; top up hot liquid | Maintains even simmer and temperature |
Follow these steps and your next recipe will recover faster and taste brighter.
Alternative methods and how their times compare
Different appliances change total minutes but keep the same goal: tender meat and a glossy, flavorful stock.
Pressure cooker (Instant Pot): Sear on Sauté, then cook under high pressure for about 50 minutes with a 10-minute natural release. Use Sauté afterward to reduce the sauce if you want a thicker finish.
Slow cooker: Brown pieces and onions first, then cook on low for 8 hours or high for 4 hours. For a glossy gravy, transfer liquid to a small pot and simmer 10–15 minutes to concentrate flavor.
Oven braise in a dutch oven: Sear, add stock, cover tightly and bake at 320°F for 2–2.5 hours. Stir once halfway, then reduce liquids on the stovetop if you prefer a richer sauce.
“Pressure cookers cut active time; slow cookers give set-and-forget ease; an oven braise builds roastiness from the fond.”
All methods benefit when you keep liquid levels sufficient so pieces remain submerged in the pot. Confirm doneness by fork-tender texture and an internal read of 165°F before serving.

| Method | Active Hands-On | Total Time | Finish Step |
|---|---|---|---|
| Pressure cooker | Brown, seal, release | ~60 minutes (50 + 10) | Reduce on Sauté if desired |
| Slow cooker | Brown then set | 4 hrs high / 8 hrs low | Reduce liquid 10–15 minutes in pot |
| Oven braise (dutch oven) | Sear, cover, bake | 2–2.5 hours at 320°F | Stovetop reduction for gravy |
Conclusion
Wrap up with clear, confident steps. You now know the key stovetop timing windows: about 45 minutes plus 30 with vegetables for raw pieces, and roughly 1.5–2 hours for pre-smoked ones. Use gentle heat, steady liquid levels, and a heavy pot for the best tenderness.
Doneness cues, fork-tender pull, clean bone release, and an internal read of 165°F tell you when to rest and plate. Season late for smoked cuts and finish with pepper and fresh herbs for balance.
With this recipe guidance you can serve turkey necks as cozy, budget-friendly dishes. Pair them with rice, greens, mashed potatoes, or broth and baguette for a family meal that stretches into tasty leftovers.