Learn How to Cook Turkey Necks to Perfection
You remember that smell from childhood kitchens — sizzling meat, warm spices, and the hush that comes when a pot simmers. That memory is why this recipe matters. It connects comfort with craft and gives you the confidence to make a meal worth sharing.
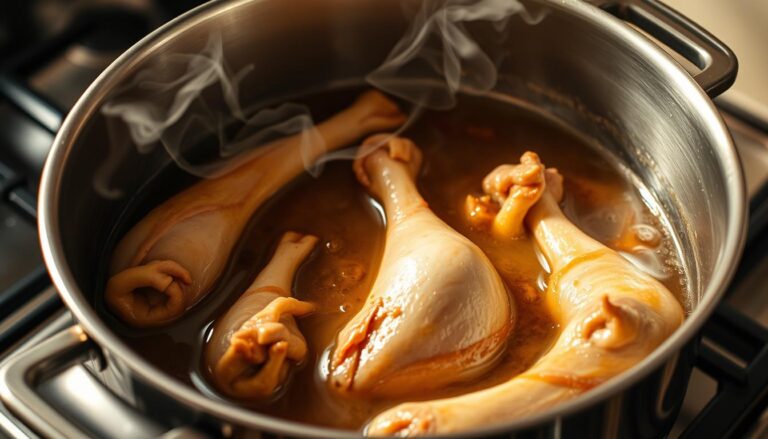
In this section you’ll learn a clear path from prep through searing and braising in a heavy pot. Searing builds fond that you will deglaze with chicken broth, then braise low and slow for deep flavor and tender meat.
You will see which ingredients shape the dish: Cajun or Creole seasoning, onion, celery, bell pepper, and garlic. Choices on finishing—thick roux gravy or a lighter jus—let you match texture to your plate.
Follow simple timing windows and storage tips so leftovers stay great. By the end, you will feel ready to cook turkey necks with calm and clear results.
Table of Contents
Why Turkey Necks Make a Flavor-Packed, Budget-Friendly Dinner
Small pieces deliver big returns: flavor, body, and budget-friendly appeal. You get exceptional value because these cuts are rich in collagen and natural fat. That creates a glossy sauce and deep, meaty taste without a high price tag.
Dark meat and collagen break down with patient heat. Low-and-slow braising for roughly 1 hour 50 minutes up to 3½ hours turns tough connective tissue into spoon-tender goodness.
Dark meat, collagen, and fall-off-the-bone tenderness
Pat pieces dry with paper towels before seasoning. A dry surface and steady heat give better browning and more fond for the sauce. Searing first, then sautéing aromatics in the same pot pulls all that flavor into your braise.
How slow cooking builds deep, Southern-style flavor
Use chicken broth rather than plain water for a richer base. Let spices and a little pepper bloom slowly so the salt and aromatics balance the meat’s richness. Smaller pieces may finish in under two hours; larger cuts need more time. Serve with potatoes or rice for classic comfort.
- Value: rich texture without a big cost.
- Technique: sear, sauté, deglaze, then braise.
- Liquid: broth adds depth; fat and collagen thicken the sauce naturally.
Ingredients You’ll Need for Tender, Juicy Turkey Necks
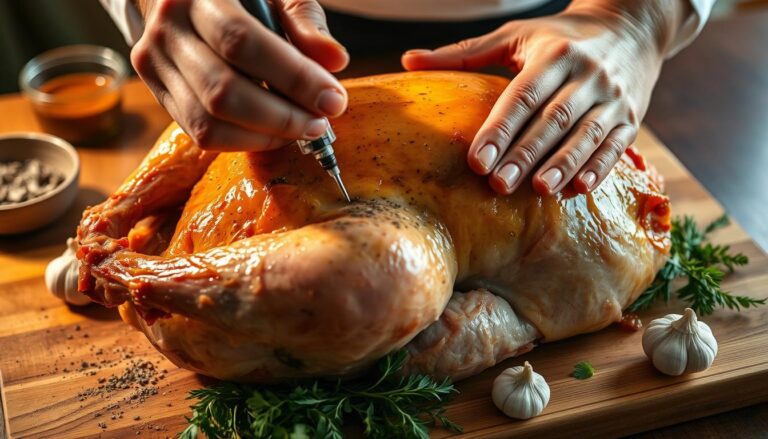
Gather a handful of dependable ingredients that promise rich, braised flavor and glossy sauce. Start with quality turkey necks, a good Cajun or Creole seasoning, and the classic aromatics: onion, celery, bell pepper, and garlic.
Choose chicken broth over water for a savory braising liquid; low-sodium broth gives you control of salt. Add bay leaves, thyme, or sage for herbal depth, and a splash of lemon if the meat smells strong.
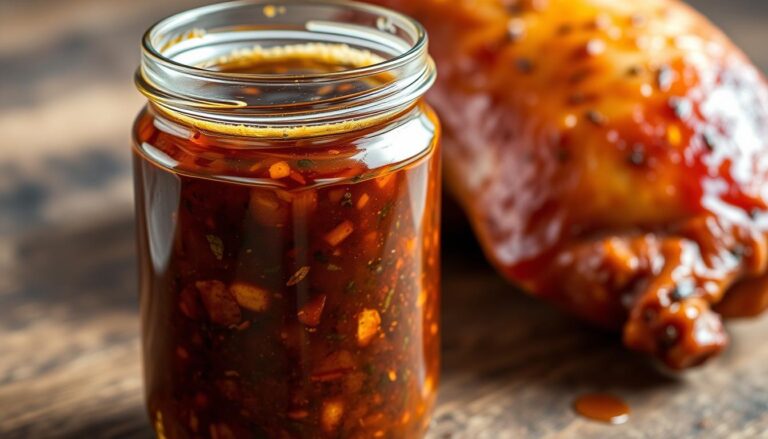
For a silky gravy, make a roux with flour, avocado or vegetable oil, and butter. Cook the roux until it reaches a peanut-butter brown for nuttiness, then whisk it into the braising juices.
“Measure ingredients ahead and keep your pot ready; a smooth mise en place makes the whole recipe calmer and faster.”
- Manage salt with low-sodium blends or incremental kosher salt.
- Add umami with soy sauce or Worcestershire for deeper broth without heaviness.
- Use fats with high smoke points for searing and roux work.
- Short, minutes-long sauté of aromatics is enough before adding liquid—dark meat and collagen enrich the sauce as it braises.
Essential Tools and Setup
Gather simple, sturdy gear so the cooking step runs without surprises. A solid Dutch oven or heavy-bottomed pot lets you sear on the stovetop and move straight to the oven with a lid or foil.
Prep tools matter: use paper towels to pat pieces dry before seasoning so they brown, not steam. Keep tongs nearby to turn meat safely over steady heat. A sharp knife and firm cutting board speed trimming and chopping aromatics.
Cookware and small tools
- Choose an oven-safe skillet or Dutch oven that moves from range to oven.
- Pick an oil with a high smoke point for a clean sear and good fond.
- Pre-measure stock and seasonings so you can deglaze quickly after browning.
- Monitor oven temperature to maintain a gentle simmer and preserve juiciness.
| Item | Why it matters | Tip |
|---|---|---|
| Dutch oven / heavy pot | Even heat and oven transfer | Use a tight lid or foil for braising |
| Paper towels / dry paper towels | Improves browning | Pat thoroughly before seasoning |
| Tongs & knife | Safe handling and clean prep | Turn pieces gently; trim excess fat |
| High-smoke-point oil | Proper sear without burning | Canola, avocado, or grapeseed work well |
Step-by-Step: How to Cook Turkey Necks
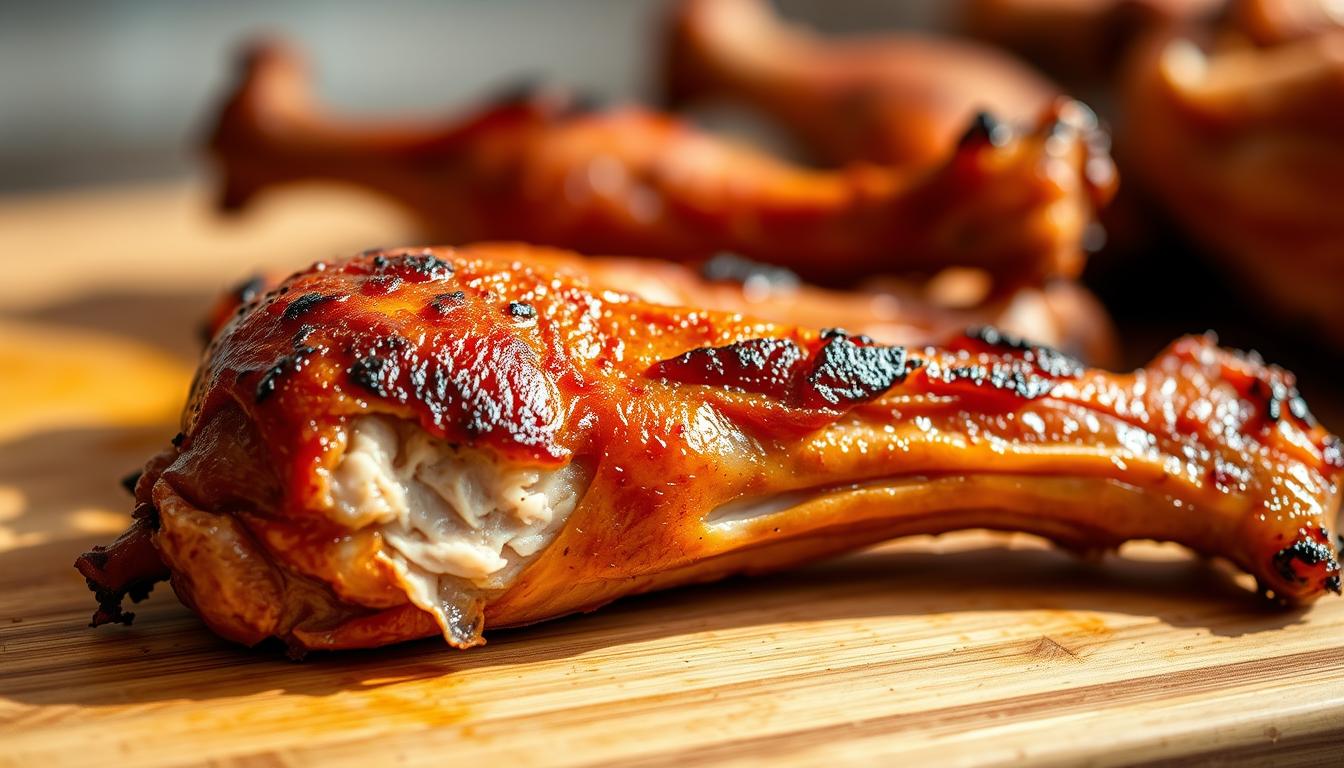
A confident sear sets the stage: dry the meat, season boldly with Cajun or Creole mix, and brown in a hot, oiled pot until a golden crust forms. Sear each side about 2–3 minutes; total browning time often runs near 8 minutes depending on size.
Sauté aromatics next. Remove the pieces, then sweat onion, celery, bell pepper, and garlic cloves in the same pot until fragrant. Pour in chicken broth and scrape the bottom to lift the fond; that liquid is concentrated flavor for the braise.
Return the meat, add liquid so it reaches partway up the sides, and cover tightly. For fork-tender results, bake at 350°F about 1 hour 50 minutes to 2 hours, or at 300°F for 3–3½ hours. Check doneness by piercing; the meat should give and pull from bone with little resistance.
Finish the sauce your way. Stir a roux made from flour and fat into the braising juices for a rich gravy, or strain and serve the thinner pan juices as a lighter jus. Taste for salt and pepper, and keep extra broth or a splash of water nearby in case the sauce reduces too far.
- Pat dry, season, and sear to develop fond.
- Sauté aromatics and deglaze with chicken broth.
- Braise covered until fork-tender; choose roux or pan juices for gravy.
Smothered Turkey Necks with Cajun Gravy
Choose a silky gravy or a light pan jus and you change the mood of the whole meal. For a smothered finish, build a roux by browning flour in oil or butter until it reaches a peanut-butter color, then whisk in warm broth for a glossy gravy that clings to meat.
Roux-based gravy vs. thin jus: omit the roux for a lighter sauce that spotlights pan juices. The thin jus shines when you want brighter, leaner flavor on rice or mashed potatoes.
Bloom seasoning in hot fat so spices open before you add broth. Layer bay leaves, thyme, and sage, then add a pinch of cayenne or Cajun blend for gentle heat.
Watch salt and pepper at the end; reductions concentrate saltiness. Simmer a few extra minutes for a thicker nappe, or splash in more broth if the sauce tightens too much.
Keep a small pot of warm sauce on low while you plate. Finish with chopped scallions and parsley and serve over creamy mashed potatoes for a classic, tender turkey presentation.
Alternate Cooking Methods: Oven, Slow Cooker, Instant Pot
Pick the method that fits your day: an oven for deep, developed flavor; a slow cooker for hands-off convenience; or an Instant Pot when speed matters.
Oven-braised: sear first, deglaze with chicken broth, then bake at 350°F about 1 hour 50 minutes to 2 hours for average pieces. For larger pieces, drop the temp to 300°F and plan 3–3½ hours. Check by piercing with a fork for tender meat.
Slow cooker: brown pieces, add enough liquid so the sides are coated but not submerged, and set on low for roughly 6 hours. This yields steady breakdown of collagen and a rich sauce without babysitting.
Instant Pot: sear in the pot on high, deglaze with broth, then pressure-cook on high about 1 hour. Use a natural release for extra juiciness and confirm doneness by fork rather than clock.

- Keep salt minimal at the start; reductions concentrate seasoning.
- Adjust minutes slightly for thicker or halved pieces.
- Use a splash of oil for searing and a pinch of pepper when finishing.
Cooking Time, Doneness, and Size Tips
Timing your braise around piece size gives you consistent, fork-tender results.
Cooking time varies with size: smaller turkey necks often finish near 1 hour 50 minutes to 2 hours at 350°F. Larger pieces do best at a gentler oven temp and may need 3–3½ hours.
How long based on size
Halve very large pieces so heat reaches the center and turning in the pot is easier.
Doneness cues: fork-tender and easy shredding
Forget strict minutes; watch texture. The right sign is meat that yields to a fork and pulls from bone with little resistance.
“You know it’s done when the meat slips clean from the bone and the sauce tastes concentrated.”
- Top up liquid with broth rather than water to keep consistent flavor.
- Use minutes and hours as a guide, but let the meat’s texture decide.
- Check by piercing with a knife or fork rather than relying on a thermometer.
| Size | Oven temp | Approximate time |
|---|---|---|
| Small pieces | 350°F | 1 hr 50 min – 2 hr |
| Large pieces (halve if possible) | 300°F | 3 – 3½ hours |
| Slow-cooker/Instant Pot | Low / High pressure | 6 hours / ~1 hour (pressure) |
Final cue: when tender turkey pulls apart cleanly and the pot sauce balances, you nailed it.
Prep, Sourcing, and Safety
Begin your prep with a quick call to the butcher or a trip to the grocery counter. Availability varies; many stores stock these cuts seasonally. If you want a steady supply, call your local grocery store or visit a butcher who carries them year-round.

Where to find them
Look near other turkey cuts and ask staff for fresh pieces. Avoid smoked varieties if you need raw meat for braising. Smoked items are fully cooked and suit soups or beans rather than a braise.
Cleaning and drying
You can rinse under cool water and then pat dry with paper towels. Some cooks prefer a mild baking soda rinse for extra cleaning. After any rinse, use dry paper and let pieces air briefly before seasoning.
Butcher requests and safety
Ask your butcher to halve larger necks so they cook evenly and turn easily in the pot. Store raw meat in the fridge up to three days. Chill cooked leftovers within two hours and keep them in airtight containers with a little broth to preserve juiciness.
“Handle raw meat promptly and keep chilled; safety keeps flavor intact.”
| Tip | Why it matters | Quick action |
|---|---|---|
| Call ahead | Seasonal stock varies | Reserve or confirm availability |
| Choose fresh, not smoked | Smoked is pre-cooked | Use smoked for flavoring, not braise |
| Dry well | Better browning | Pat with paper towels and air briefly |
Seasoning Swaps, Substitutions, and Dietary Tweaks
Adjust a few key pantry items and you can adapt this braise for allergies, preferences, or lower sodium without losing depth.
Creole vs. Cajun: choose Creole for herb-forward notes or Cajun if you want more heat. Pick a low- or moderate-sodium blend and hold back on added salt until the end. Let pepper brighten the finish so the meat stays central.
Gluten-free and soy-free swaps
For a gluten-free gravy, use a certified GF all-purpose flour for the roux. Swap tamari for traditional soy sauce and check labels for cross-contact. These small swaps keep sauce texture and savory depth.
Oil and dairy-free options
Use a neutral, high-smoke-point oil such as avocado or grapeseed for searing. Replace butter with plant-based spreads when you need dairy-free richness. You’ll preserve a silky mouthfeel by finishing the sauce with warm chicken or broth and a touch of fat.
Ingredient and additive notes
Trim added sugar and complex blends by reading labels; choose simple ingredients and build flavor from aromatics and stock. That keeps the recipe focused and lets the glossy sauce shine over rice or mashed potatoes.
“Adjust seasonings late and taste often; small changes keep the braise balanced.”
| Swap | Use instead | Why it works |
|---|---|---|
| Regular flour | GF flour blend | Keeps roux texture without gluten |
| Soy sauce | Tamari (GF) | Same umami, less risk for gluten |
| Butter | Plant-based butter | Maintains richness for dairy-free diets |
Serving Ideas, Sides, and Leftovers
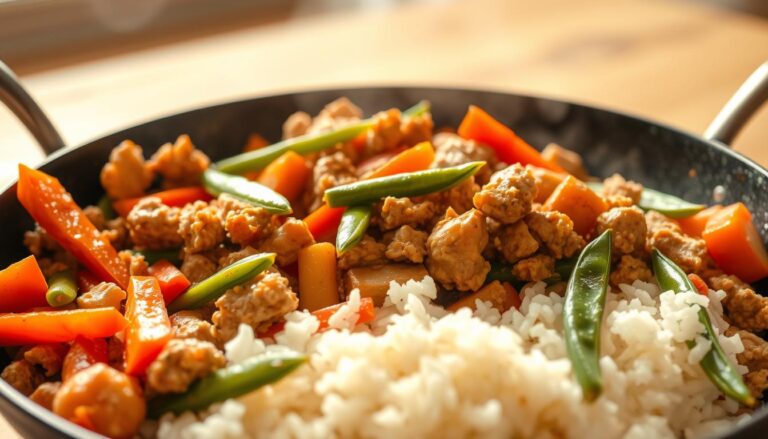
Select simple sides that soak up the braising liquid and add balance. Spoon rich gravy over steamed rice or creamy mashed potatoes for a classic plate. Add a bright garnish of scallions and parsley for freshness.
Quick pairings:
- Rice, mashed potatoes, or quinoa for starch that holds sauce.
- Sautéed greens, black-eyed peas, or beans for color and contrast.
- Crusty bread to catch every drop from the pot.
Store leftovers in airtight containers with a ladle of chicken broth or pan juices. Refrigerate for up to 3–7 days, or freeze for up to two months.
| Action | Time | Tip |
|---|---|---|
| Refrigerate | 3–7 days | Keep a little broth with the meat |
| Freeze | Up to 2 months | Label with date and portion size |
| Reheat | About 10–20 minutes | Use low heat and a splash of water or broth |
Turn leftovers into new recipes: shred meat into dirty rice, add to beans, or toss with collard greens for a fast, flavorful meal. These ideas stretch grocery buys and deliver big comfort in minutes.
“Reserve pan juices; they revive texture and deepen flavor when reheating.”
Conclusion
Finish strong: a hot sear, a clean deglaze, and steady oven time give you a reliably tender necks recipe that highlights rich flavor from the pot.
Choose your sauce: make a roux for a silky gravy or strain the pan juices for a lighter jus. Adjust salt and herbs at the end so seasoning lands just right.
Expect typical oven minutes from about an hour and fifty minutes up to 3½ hours depending on piece size and heat. Watch for fork-tender meat as your true doneness cue.
With this simple recipe roadmap you can recreate a comforting, budget-friendly meal any night. Serve turkey necks over rice or mashed potatoes and enjoy a proud, flavorful plate.